Creating Message Templates for EnCap
Follow the steps below to create the message templates required for scheming the activity flow of EnCaps.
- Click
 in Message node to create a new message template.
 - In Create message template page, enter an unique identifier for the message in Message Identifier.
Info! Message Identifier is the name given to the message
- Type the message to be displayed in the welcome page of the EnCap. Whether you’re creating the EnCaps for a booking reminder, delivery update, or a Black Friday offer, short and sweet is the recipe for success. Create the message that is short, succinct and well within 160 characters. As a rule of thumb, 100 characters is the optimum amount.
The message can be a rich text, plain text, image, any media, or cards.
 - Apply bold effect to your text
 - Make the text Italic
 - Insert hyperlink to text
 - To add code snippets to your text
 - Option to add quotations to the text that span multiple times
 - Displays the text in unordered (bulleted) list
 - Lists the text in numbers
 - Expand this option to add multilevel headings (
 - Used to reverse the text in its older state
 - Option to redo the text over again
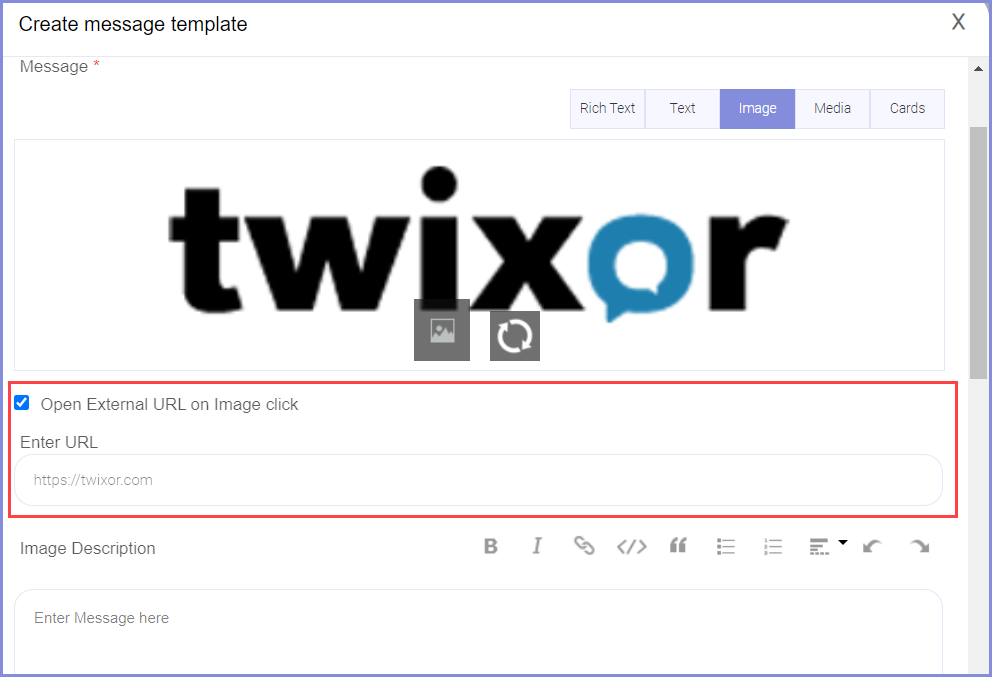
 and
and  .
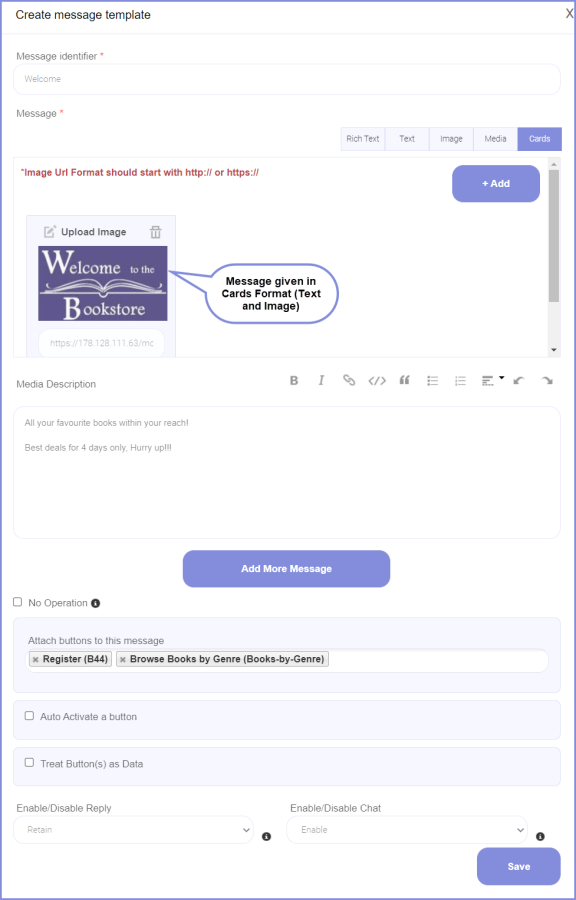
.Begin by creating a welcome message for the Book Store EnCap as a Card. To do this, click Cards option to create the welcome message containing both image and text.
Add More Messages
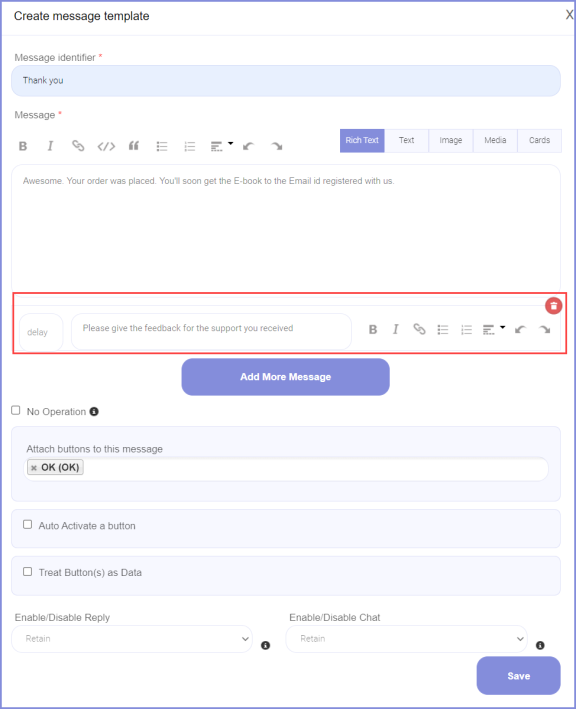
- Click Add More Messages to display any information in addition to the main message. Provide the delay in seconds to display the additional message after a certain set time.
No Operation
You can select No Operation option if you don't want the user to do any action in EnCap. If you select this option, you cannot attach any buttons to this message and the conversation will move on to the next message without any user interaction.

Attach Buttons to this message
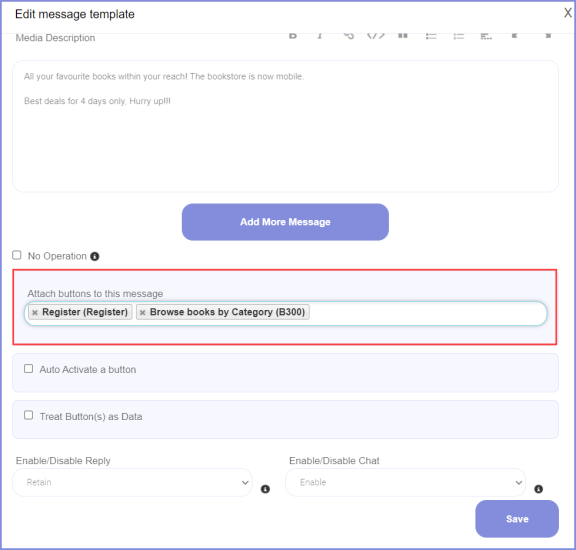
- Click on the Attach buttons to this message field to attach the buttons for this message. Here we have included two buttons namely Register and Browse Books by Category. These buttons belong to Form button type about which you can refer to Create Buttons guide.
Auto-Activate a Button
Do you want to activate a button automatically when the page loads? You can do this by employing the Auto-Activate button feature that allows you to add the auto-click button in your message at the selected period.
- Enable Auto Activate a button checkbox and attach a button that can be executed automatically.

- You may set a delay (in seconds) if you want to auto-click the button after a pause.
Treat Button as Data
- Click Treat Button(s) as Data to save the button as data. It should be noted that the Message Identifier given for this template will be taken as the Key for this data.
Info! This data will be displayed in the Form Report for reference
- From the Retain/Enable/Disable reply box, select the options to configure the reply box.
- Select Retain to bear the existing state of the reply box
- Choose Enable/Disable options to either enable or disable the reply box from the PWA message respectively
- To Retain/Enable/Disable chat icon from the message, select any one of the options given below.
- Choose Retain option to hold the existing state of the chat icon
- Select either Enable/Disable option to open or close the chat icon from the message
- Click Save to save the message template.
In the same manner, create templates for other messages used in the EnCap.
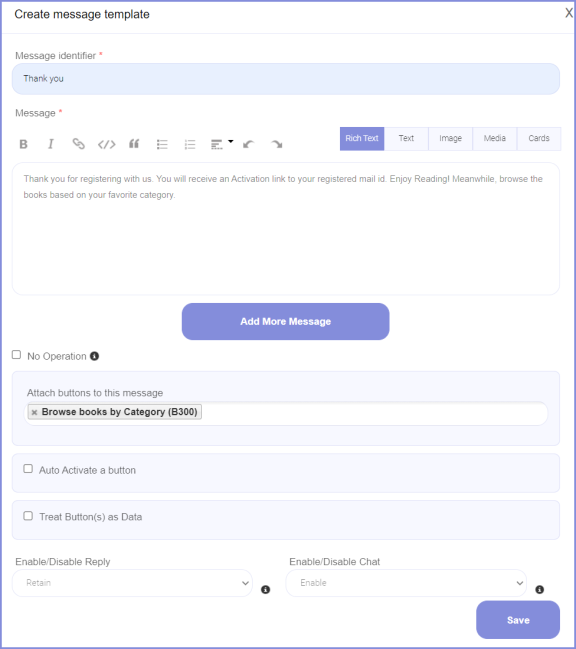
Below shown is the Thank You message template that will be displayed after the registration.
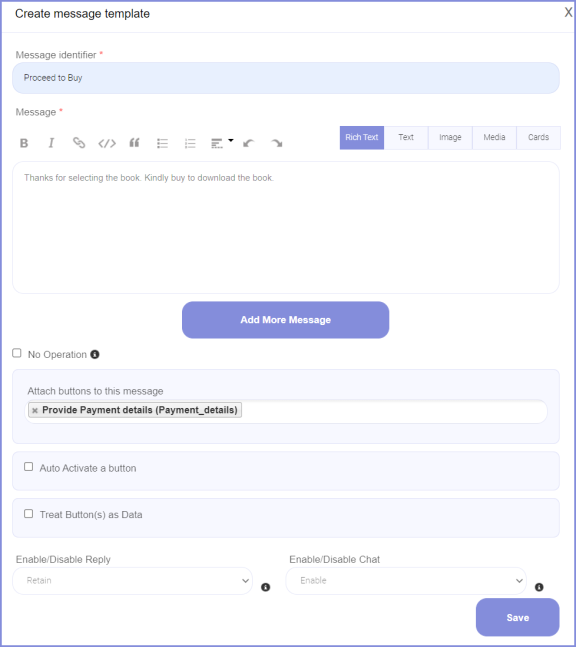
Below displayed is the Proceed to Buy template to ask the customers to pay for the books they selected by clicking the Pay button.
If you want to take any decision based on certain conditions, you can do it by placing the Decision Node in the workflow as explained in the next guide.
